Wednesday, July 23, 2014

Tostones...Twice Fried Green Plantains

Well, hello old friend.  Long time, no blog.  I'm guest blogging on my husband's site today at AlbuKirky BBQ & Other Stuff and thought I would go ahead and reprint the post here.  I've missed Risotto Stone and since I'll be spending less time on my handmade card blog, The Ink Trap, I thought that maybe, just maybe, I might hang out here a bit more.  We shall see...

Mrs. AlbuKirky here, sharing with you today,  part one of a trilogy of posts inspired by what else...a trip to the movies.  Food in film is not a rarity.  Sometimes it plays a leading character and sometimes it blends into the background.  Sometimes it represents wealth and abundance, and sometimes it's scarcity depicts longing and poverty.  Whatever the case may be it's presence can be powerful.  While the food itself almost becomes another character, less attention gets paid to the people who put it on the plate.

Not so in the new movie, Chef, written and directed by Jon Favreau, who also plays the leading character and acts alongside a handful of his Hollywood homies.  The limited screen times of Scarlett, Dustin, and RDJ has me thinking that Mr. Favreau called in a few favors, which is absolutely fine with me, because the story is carried largely by Mr. Favreau's character, Chef Carl Casper, his loyal sous chef Martin, his son Percy, and his ex-wife Inez, played by John Leguizamo, Emjay Anthony, and Sofia Vargara, respectively.

Various reviews I've seen online describe the story as predictable, but that's ok because the characters are extremely likable and the story that unfolds feels completely believable.  I felt like a fly on the wall eavesdropping on real interactions between real people.  The only detail that left me feeling bamboozled was the complete metamorphosis of a rusted out, run down taco wagon into a beautiful fully realized food truck butterfly in a matter of only 2 days.  Our spare refrigerator in the garage went out and it took us a full 2-weeks to shop for, purchase, and await delivery of a new one.  Actually, it took 3 deliveries, before everything was completely settled.  I guess it would have played out more quickly if we had John Leguizamo's cousins putting the wheels into motion.

All in all...I LOVED this movie!  I wanted to sit down with these characters and share a meal and a conversation about food with them.  Even better than that, I wanted them to cook for me.  Alas, since this is a movie and that's not a possibility, I continued to watch them lovingly prepare their signature food truck dish, a cubano sandwich and tostones, and I thought to myself...we could do that. And so we did.  Maybe not as elegantly as our cinema culinary heroes on the big screen did, but dammit, we pulled it off pretty well.

Part 1 begins with tostones; delicious, twice-fried, green plantains.  More savory than sweet, because they're not quite ripe, they partner well with the strong flavors of the spicy garlic sauce I prepared to accompany them.  I found this recipe and technique online here.  While the sauce was good, I am going to add a touch of honey next time I make this.  I think the addition of a bit of sweet will round this sauce out and turn it into something I will want to add to lots of dishes.  Plus, the tostones, while savory in their green state, seem to yearn for something to soften the sharp heat of the garlic.

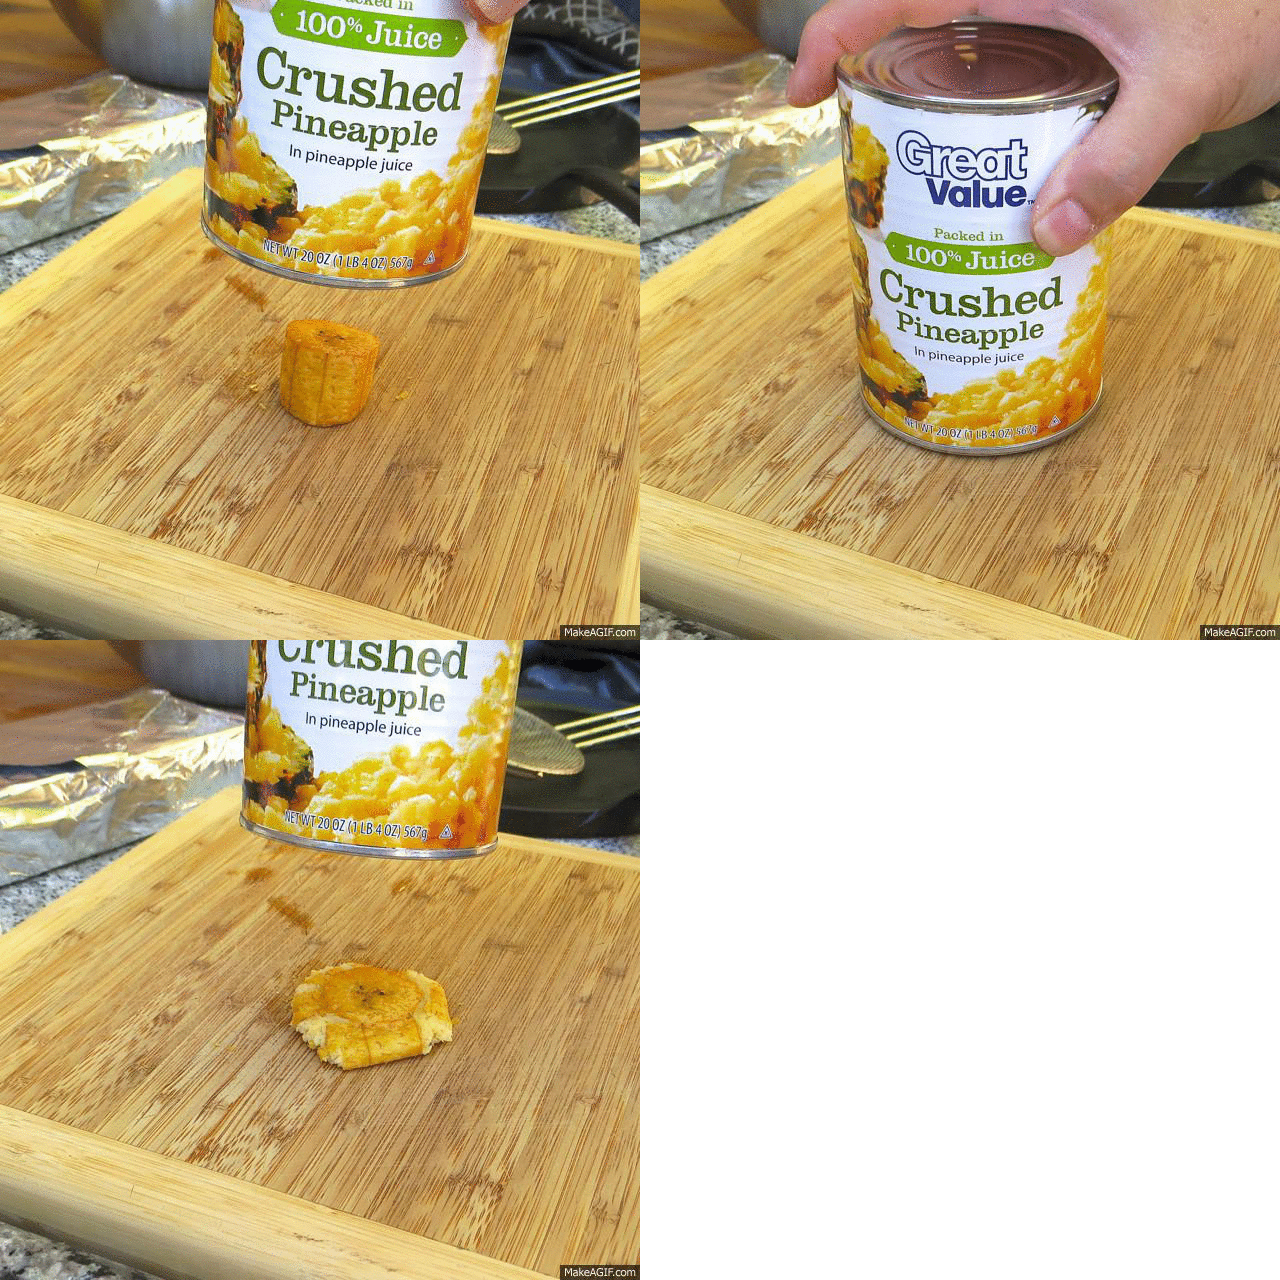
Ideally I would have used a simple wooden tostone press to make these, but numerous trips to all of the Hispanic markets in town left me unim-press-ed...(I made a funny)!  Instead I opted to use a large can of Crushed Pineapple.  I chose this can primarily for it's size and heft, but also because it contained the word "crushed" in the title.  How appropriate.

Shall we begin?

Let's get these lovely green senoritas ready for the dance.  Slice the ends off the plantains off and cut a seam down each side of the peel.  Pull the peel off one half at a time.


Slice the plantains into 1" pieces.


Toss the plantains into their hot oil bath and fry until slightly golden brown.  We took this process outside and used our Disc-It.  No fuss, no muss!


Look at that golden tan!  The first fry blanches the plantains making them just pliable enough to smash for the second fry.  


Tostone Crusher on Make A Gif
Speaking of smashing...no tostone press?  Never fear!  Grab a hefty canned good and go to town.  (By the way, check out this nifty GIFty I made!)


Obviously, our chicas bonitas had a little too much fun at the dance, because now they're smashed.  (I love a pun, good or bad.  I should just apologize now for all of the future word butchery I plan to make when I blog on Kirk's behalf.)


Toss the smashed plantains back into the hot oil for dip number two.  NICE!


After a couple of minutes, they should turn a deep golden brown.  Pull them out and drain them on a  paper towel.  Dust immediately with salt and pepper, and cash in on that crispy, crunchy texture. 


Fried Tostones 

5 Green Plaintains
Oil for frying
Salt
Pepper
(we used Casa Seasoning)

Garlic Dipping Sauce

1/3 cup Olive Oil
1 teaspoon Fresh Parsley (minced)
1/4 teaspoon Cayenne Pepper
1 tablespoon Lime Juice
5 cloves finely minced Garlic
Salt and Pepper to taste

Heat 2 or 3 inches of oil to 375ยบ.  We used our Disc-It outside, the perfect place to fry.

While the oil is heating, peel and slice the plantains.  The peel is thick so cut a seam down each side and pull the peel off in halves.  Slice the plantains into 1 inch pieces.

Place the sliced plantains into the hot oil and fry until they just start to turn golden.

Pull them out of the grease and drain on paper towels.  Once they are cool enough to handle, smash the plantain pieces into rounds using a tostone press or large can.

Place the smashed plantain rounds back into the hot oil and fry again until golden and crispy.

Remove from the oil and drain again on paper towels.  Dust them immediately with salt and pepper (we used Casa Seasoning).

To make the sauce, whisk all of the ingredients together in a small bowl and serve.


Check back and we'll share Kirk's recipe for a Latin inspired citrus-infused pulled pork, my recipe for homemade sandwich rolls, and how we pulled it all together for Cubano Sandwich Night.  

Monday, August 8, 2011

Panzanella: Bread Salad

As you can guess, I am not a ravenous veggie eater.  Just take a look at the few recipes I've posted thus far and you'll quickly see that my preferred foods of choice consist of various combinations of sugar and fat.  I'll frequently bulldoze through the main course of dinner just to reach the sweet payoff at the end...dessert.  I've even been known to eat a thick slice of cake or a fat wedge of pie in place of breakfast.  It's wrong on so many levels, but damn, it tastes so right.  It's not all bad, I wash it down with a big glass of milk to keep these middle aged bones in good working order.  That's healthy, right?  Hell, who are we kidding, hook me up to a glazed donut I.V. and I'd happily live out the rest of my days (daze, lol!) with a goofy sugar coma perma grin on my face.  

Yes, sugar is my friend and nothing comes between this unholy union until Summer rolls around.  Believe it or not, when warm weather hits I actually start to crave the leafy brightness of the Summer salad.  They come in all shapes and sizes and consist of a myriad of fresh, seasonable ingredients.  Add delicious accouterment such as earthy nuts, salty cheeses, and a crusty piece of bread and you have a verdant meal fit for angels.        

Summer salads are undeniably delicious.  They take the brightest and freshest gifts of the season and come together to create a powerhouse of flavors and textures for the mouth ala Mother Nature.  Yep, I'm all about the Summer salad this time of year.  During my daily food porn fix courtesy of Food Network and the Cooking Channel, I've noticed a flood of recipes for something called Panzanella, or bread salad.  In short, it looks like a variation on the Summer salad with a twist...the addition of pan toasted cubes of stale bread tossed in olive oil,  not so much treated as a crouton added on top, but rather a crusty layer of texture tossed directly into the salad used to soak up some of the fresh juices given off by the tomatoes and cukes that form the base of this meal, and also the olive oil and vinegar that dress the salad.  Sure, it's not the type of salad that is going to sit well in the fridge overnight, but it's so good and so simple that there will probably not be any leftovers anyway.  The platter in the pics below, was easily devoured by Kirk and I, with only a handful of veggies left for lunch the next day.  We carefully ate all of the bread out of the salad so the potential for soggy bread bits was averted.  Kirk grilled up some boneless, skinless chicken breasts to round out this plate and we a enjoyed a lite, satisfying meal on the patio, the best place to partake of a Summer salad.

I also added a bell pepper that showed up too late for this shoot.  Such a diva!

Toss 3 smashed garlic cloves into the olive oil to cash in that garlic flavor without adding minced garlic to the pan.  When the bread is toasty and ready to come out, pick the smashed garlic cloves out and discard.

I found these gorgeous heirloom tomatoes at our local Trader Joe's.  Beautiful and delicious.  Almost too pretty to eat...I said almost ;D

Use a spoon to scrape out the seeds from the cucumber.  This will prevent the salad from being weighted down with additional liquid from the seeds.  

All nice and clean, like two lush green veggie canoes.

A little red onion for a hint of sweet and heat.

Mmmm...golden, toasty bread shows up and now you have a party.  

Toss all the guests of honor together.  Mingle, mingle...!

A light dusting of parmesan shards is the only accessory needed to get this salad ready for her patio debut. 

Ah, grilled chicken arrives and now we have a meal.  
   
Panzanella aka Bread Salad


3 cups cubed stale bread
3 cloves of garlic lightly smashed
3 cups of cherry, grape, or miniature heirloom tomatoes, halved
1 english cucumber, sliced with seeds removed
1 bell pepper (red, green, or yellow), cut into large dices
Red onion sliced
6 tablespoons olive oil, divided
3 tablespoons of white wine vinegar
shredded parmeson for garnish
salt and pepper to taste

Heat 3 tablespoons of the olive oil in a skillet over medium low heat, toss in the smashed garlic cloves.  Once oil is hot, toss cubed bread into pan and coat thoroughly with the olive oil.  Continue toasting bread cubes until crispy and deep golden brown (approximately 10 minutes).  Remove from heat and discard galic cloves.  In a large bowl combine tomatoes, cucumber, bell pepper and red onion.  Drizzle with remaining olive oil and vinegar.  Add salt and pepper to taste.  Add cubed bread, toss all ingredients together. and serve immediately.  

Friday, July 29, 2011

Sopapilla Cheesecake

Well, whaddya know?  I'm back and it's only been a week since my last post.  That is a remarkable improvement, wouldn't you say?  I've noticed a trend in my recipe posts.  Have you picked up on it yet?  I won't leave you in suspense too long, so I'll just tell you.  The recipes I have featured on my blog thus far have been mostly beige in color.  It's almost embarrassing.  You might as well call this Cheryl's Beige Food Blog. Well, I promise to add a bit of color next go round. What color should I shoot for?  Maybe, fuchsia?  I don't know, I'll work on it.

Today I am sharing with you yet another beige dish.  This one is called a Sopapilla Cheesecake.  It consists of only a handful of ingredients, but they are quite fabulous when mixed together.  I tripped across this tasty treat on a site called Pinterest.  Have you heard of it?  If you haven't, I urge you to stay far away from it, unless you actually have 12-hrs a day that you are needing kill, because it is highly addictive.  I'm talking 12 Step Program, addictive.  I'm talking let's schedule an intervention, addictive.  It is crack for the eyes...fabulous "pinned" pictures on any topic that you can imagine.   It is perfect for the food "pornagrapher" because while you are pretending to be interested in Shakespearean quotes cross-stitched onto pillows or an aqua toaster shaped liked a VW Minibus, you can secretly skim all the food photos and "pin" them onto your "Dirty Little Secrets" board for closer inspection at a later time devoid of watchful eyes.  That's how I found this little tastebud teaser.  I was dazzled by a rockin' photo of delicately combined carbs, fat, and sugar and decided to see where the attached link took me.  Once there, I found out that Sopapilla Cheesecake is very popular among the office potluck and church picnic circuits.  This led me to refer to my smarty pants friend, Google, to see what other recipes were floating around the Internet for this dish.

Low and behold, there were about a gazillion.  I settled on one I found on allrecipes.com and decided to give it a go.  None of them vary by much, but leave it to me to try the one that requires 3 packages of cream cheese rather than 2.  I'm pretty sure I chose the right one.      

Only a few ingredients needed to create something truly delicious.

The cream cheese, vanilla, and sugar get the honor of the first dance.  I throw in an egg just to make sure the cheesecake filling sets up properly.

One package of the crescent rolls adorns the bottom of the pan.  Pinch the seams together, then spread the cheesecake mixture on top.  

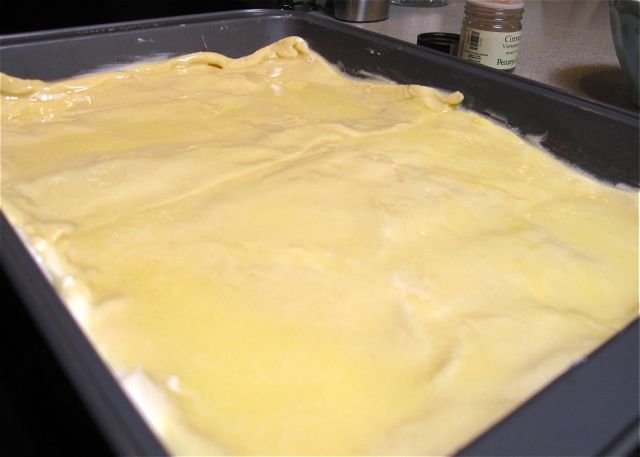
The second package tops the mixture.  Pinch these seams together, as well.

Ahhh, butter.  Right down over the top.  It might be bad for the heart, but it is good for the soul

Post butter bath.  

A nice coating of sugar and cinnamon as if the butter weren't enough.

Golden and delicious right out of the oven.

A drizzle of honey finishes this off perfectly and makes it taste like a cheesecake filled churro.
Sopapilla Cheesecake Recipe

3 (8 oz) packages cream cheese softened
1 egg
1 1/2 cups white sugar
1 1/2 teaspoons vanilla extract
2 (8 oz) cans crescent roll dough

6 tablespoons melted butter
1/2 cup white sugar
1 teaspoon ground cinnamon

Preheat oven to 350*.  Beat the cream cheese, egg, sugar, and vanilla in a bowl until smooth.  Lay one package of the crescent dough into the bottom of a 9 x 13 greased pan.  Pinch seams together.  Evenly spread the cheesecake mixture into the pan.  Lay the second package of crescent roll dough on top, again  pinching the seams together.  Brush the melted butter over the top, and sprinkle with the sugar and cinnamon mixture.  Bake in the preheated oven until it turns golden brown, approximately 45 minutes.  Let cool completely before cutting.  Serves 12.

Friday, July 22, 2011

Feeling Blue...Blue Cheese Dressing, that is!

I'm back!  As promised, with a recipe.  AND it's not just any recipe.  Instead, I give you a true "blue" Cheryl Original.  At first glance, you spy the title and think "big deal, it's a dressing recipe".  Let me tell you, it has taken me years to come up with this recipe and I was tweaking it even as recently as a few months ago.  Finally, I am proud to say, it's perfect.  No more tweaking necessary.  We have achieved Blue Cheese perfection.  A word of caution, this post is unnecessarily verbose today.  I guess I have missed my virtual foodie family and feel the need to make up for my absence.  Skip to the pics if you want to avoid my tales of woe concerning salad dressing.    

When I was growing up (you know it's going to be a long one when it starts out like that), we never purchased super market Blue Cheese Dressing in a bottle.  It had a very artificial taste and texture; what I imagine chewing on a couple of waded up bandaids might taste like.  So, mom purchased blue cheese crumbles in a container.  I don't remember the particular brand, but it had a dressing recipe on the lid, or the back of the container, or somewhere on the packaging.  It was a pretty good one, so mom cut it out and saved it to her special recipe file.  I'm talking paper file, not computer file, and you knew it had to be good to pass the rigorous taste requirements in order to join the other cream of the crop dishes that filled that folder.  

One day I was making this dressing and pulled out that special recipe.  I think the grocery store had started carrying a different brand of crumbles, because the recipe on this other package was obviously inferior to the one mom had so carefully cut out.  After I made it and began cleaning up, gremlins invaded the kitchen and threw out the recipe in an act of impish mischievousness.  That's the only explanation, because I would never have thrown away that Holy Grail of a recipe, yet, it was gone.  Sure we knew what was in it, but we weren't sure of the amounts.  It wasn't very complicated, but for some reason it befuddled us and we could not replicate it no matter how hard we tried.

Blue Cheese Dressing has always been the Valadez Family's favorite way to accessorize a salad.  I remember living on base in Ft. Campbell, KY when I was in the 6th grade.  One night every weekend, either Friday or Saturday, the family would pile into the car and head down the road to Charlie's Steakhouse for some of the best food I'd ever eaten during that time in my young life.  I always ordered fried oysters.  I had a very sophisticated palate and expensive tastes, even then...lol!  If dinner was slow coming out of the kitchen, Dad would grumble and blame my innocent plate of shellfish, saying "they probably had to drive to the pier and catch those damn oysters".   

The start of every meal at Charlie's meant you could choose a salad or lettuce wedge with whatever adornment your hungry little heart desired.  I always opted for the lettuce wedge with Charlie's Famous Blue Cheese Dressing.  I didn't want a variety of veggies competing for the attention of my taste buds when all I was shooting for was a conduit to get the dressing from my plate, to my mouth.  The green transport on which it arrived didn't matter.  Sure I could have asked for a bowl and a spoon, and forgone the lettuce completely, but mom and dad might have balked. 

When the salad course arrived at the table, my giant wedge would be afloat in a sea of oily pink blue cheese dressing.  To this day, we have no idea why it was oily or pink.  Must have been a combination of the elixir of the gods and fairy dust, because it tasted like heaven.  Sure, we went back to the Valadez Kitchen Lab and tried recreate it, but no amount of ketchup, cocktail sauce, or other red condiment seemed to do the trick.  Once again, we were befuddled.

Well, here I am thirty-some odd years later, still obsessing over the perfect blue cheese dressing, but I'm pretty certain that journey has come to an end.  I'm happy with this recipe.  It makes up quite a large batch, but you can eat it on salads the rest of the week.  It contains several ingredients, but each one adds it's own flavor and is completely necessary.  The final tweak was the addition of a splash of white wine vinegar.  It pulled it all together and added that little bit of tang that dances lightly on the tongue.   I'm even considering replacing the buttermilk with cream cheese to create a hot blue cheese dip similar to a dish served at a certain pub here in Albuquerque.  Oh dear, could this be another obsession?       


Lots of players in this performance, but it takes a full cast of characters to put on a perfect show.  
I use a full 8oz. container of crumbles, but feel free to cut back if it is too much for your tastes.  Many brands come in containers that are only 5ozs.
Who invited bacon to this party?!  Oh well, since you're here, I guess you can help serve.  
I like to cook bacon on a wire rack in a sheet pan in a 425* oven 25-30 mins (or until it's crispy).  Don't preheat, let the oven come up to temperature with the bacon, just like you would do if cooking it in a pan.  
Our chosen dressing to mouth conduit tonight...the lettuce wedge. 

Here is Ms. Wedge all "dressed" up and ready for a night on the town.

Cheryl's Blue Cheese Dressing Recipe

Note:  The garlic powder, onion powder, worcestershire, and tabasco measurements are not exact.  Prepare it to your tastes adding more as you prefer.

8ozs crumbled blue cheese
1 cup mayonaise
1 cup sour cream
1 1/4 cups buttermilk
2 tablespoons white wine vinegar
1/4 teaspoon garlic powder
1/8 teaspoon onion powder
dash or 2 of worcestershire sauce
3 or 4 dashes of tabasco sauce
salt and pepper to taste

In a medium bowl, stir together blue cheese crumbles, mayonnaise, sour cream, and buttermilk until well blended.  Using the back of the spoon, mash some of the crumbles to disperse the blue cheese flavor throughout the dressing.  Stir in vinegar, garlic powder, onion powder, worcestershire sauce, and tabasco sauce.  Add salt and pepper to taste.  Its even better the next day.    

Thursday, July 21, 2011

Has Anybody Seen My Food Blog?

Has anybody seen my food blog laying around?  I've misplaced it and can't seem to find it.  Oh, wait...!  Here it is!  Gosh, it's covered in dust and a few footprints...is that a tire track on it?  I better scrub this up and make it presentable for public display again.

As most of you know, I have another blog, The Ink Trap, and pay lots of attention to it, posting 3 or 4 times a week.  I keep it shiny and change out it's attire from time to time.  I spend a lot of time over there making sure it's happy and has everything it needs to flourish.  This one...not so much.  It's like having two children, you're supposed to love them equally and embrace their talents and quirks.  But you know, deep down inside...you always have a favorite ;D  You don't share this feeling with anyone..it's your dirty little secret and you will take it to the grave with you, but it's there...lol!  Admit it.

Okay, maybe not.  I don't even have kids, so what do I know?  I'm just trying to think up a humorous analogy to describe how differently I treat my blogs.  My good friend's mom, however, has 6 children and she has always and unabashedly stated that David (the baby, he's my age, but once you're the baby, you're always the baby) is her favorite.  The other 5 kids are well aware of it.  I kind of appreciate her honesty.  Of course, if she were MY mom, I might find the "honesty" thing a bit overrated.  Just sayin'...!

Anyway, I digress.  My point is...I have NOT forgotten.  I have been cooking up a storm, snapping process photos left and right, and gathering a plethora of food content for future posts.  I plan to get back on track tout de suite!  Ha!  A little French for ya in closing.  Betcha didn't see that coming ;D  Stop by tomorrow and I'll have an honest to goodness cooking post up.  Promise.  

Thursday, June 23, 2011

Tres Leches Cake or A Little Slice of Heaven, you decide!

Okay, so I'm back with a recipe for Tres Leches Cake that I promise will knock the zapatos off anyone who eats it.  I used the Spanish word for shoes, because I don't know the Spanish word for socks and I am way too lazy to look it up, even on El Google.  For a long time, I searched the land, far and wide, for a decent Tres Leches Cake recipe.  Oh yes, I had tried others, but they all came out soggy and soupy and slushy and a myriad of other adjectives that start with "s" and end in "y".  Alas, it seemed I would never find Tres Leches Cake nirvana.  

Then one day, about a year ago, I happened to be perusing the magazine rack at my local (dreaded) WalMart.  I picked up a publication with which I was not familiar called Taste of the South.  It was a thin magazine, but the pics were glossy and pretty, and the food looked tasty, so I gave it a good thumbing through.  The featured Southern city that month was Memphis, so I paused to take a closer look.  One of the pages featured a brief write-up regarding The Peabody Hotel.  I was familiar with this hotel from a previous visit to Memphis many moons ago, so I paused to read it.  Low and behold, there it was.  A recipe for Tres Leches Cake shared by the chef of the fancy schmancy restaurant located in the hotel, Chez Philippe.  I glanced through it and it looked pretty solid, so I bought the magazine and took it home to give the recipe a test ride.  The only component that seemed to require a bit of effort was a sabayon sauce.  Something with which I was not familiar.

I have to tell you, this recipe is a keeper.  If I need to impress someone, this is my "go to" dessert.  It is as stunning to look at, as it is delicious to eat.  The cake is easy to make and I am proud to say that I can now make sabayon in my sleep.  Sometimes I make the sabayon without the cake and just serve it over grilled angel food with berries.  Originally, I was tempted to forego the sabayon, but let me assure you...if you take the time to make it, you will be rewarded with a look of surprise and admiration from all who have the pleasure of partaking of this decadent creation.  JUST DO IT and I promise you will be placed on the cake baking Hall of Fame pedestal.

The starring players.

This journey begins with egg whites beaten to stiff peaks.

But, wait!  Their yolky counterparts want in on the action, too.

Gently fold the flour in to maintain the light airiness of the batter.

Into the pan.  Note all of the fabulous air bubbles.  


Ahhh, the headliners!  Please give up a big round of applause for the Three Amigos aka Three Milks.  

Be sure you have your Dia de los Muertos trivet close at hand.  A regular trivet will do until you round up one of these.  

Do not over bake!  The cake will appear a very pale golden brown and a toothpick inserted in the center will come out clean.

Don't let the cake cool!  Immediately ladle your combined milks over the hot cake.  You might be skeptical that the cake will be able to accommodate all of the liquid, but it will.  

Within minutes, the cake will absorb all of the milks.  The divot in the middle is my fault because I became impatient with ladling and actually dumped the remaining milk onto the cake.  Don't do this.  

Time for sabayon!  Have your ice bath handy.

I replace the port with orange juice and this gives the sauce a light citrus flavor.  Whisk the ingredients continuously over a double boiler until ribbons fall from the whisk when lifted.  This will take approximately 20-30 mins to attain.

It's really hard to capture the ribbons falling while holding the camera with one hand and the whisk with the other.  

Into the ice bath, we go!  Whisk until completely cooled.  Sauce will thicken.  Look at those ribbons now!


Beat one cup of heavy whipping cream and fold into the mixture in thirds.

NICE!!!  Now the cake and the sauce can go into the fridge for at least 2 hours or overnight.  Whatever's convenient.

Once the cake is chilled it takes on almost a custard texture.  The fruit lightens the dish and the sauce makes your eyes roll back in your head.  Seriously.  
Mmmmm...this is my hand selected piece.  Hey, I made it!  I get first dibs!  ;D

This post is a little picture heavy.  I apologize for that.  I hope you'll try this recipe.

Tres Leches Cake with Sabayon  -  printable recipe
Cake:
8 large eggs, separated
1 cup sugar
1 cup all-purpose flour, sifted
2 cups heavy whipping cream
1 (14 oz) can sweetened condensed milk
1 (12 oz) can evaporated milk

Berries:
1 1/4 pounds fresh berries (I like a combination of blueberries, blackberries, and strawberries)
4 tablespoons of sugar (add more or less depending on your preference)

Sabayon:
4 egg yolks
1/2 cup sugar
1/4 cup orange juice (recipe calls for port, but I make this substitution)
1 cup unsweetened whipped cream

Directions:
1.  Preheat oven to 350*.  Grease and flour a 13x9x2 backing dish.
2.  For cake, in a bowl, beat egg whites at high speed with an electric mixer until stiff peaks form.
    add egg yolks and continue beating until fully incorporated.  With mixer running, gradually add sugar.
3.  Fold flour into egg mixture.  Transfer batter to prepared cake pan, smoothing top to level.
4.  Bake until a wooden pick inserted in the center of the cake comes out clean, approximately 20 mins.
    Do not over bake.
5.  Meanwhile, in another bowl, combine whipping cream, condensed milk, and evaporated milk, stirring
    well to blend.  When cake is done, immediately pour combined milks over the hot cake.  Let cool, then 
    refrigerate for at least 2 hours.  
6.  For berries: 1 hour before serving, slice berries  and toss with sugar.
7.  For sabayon, combine egg yolks, sugar, and orange juice in the top of a double boiler over simmering 
    water.  Do not let bowl touch water.  Whisk until very thick or until ribbons form.  Whisk over an 
    ice bath to cool.  Sabayon should thicken further at this point.  Fold in whipped cream.  Refrigerate 
    until serving time.  Sabayon can be made a day ahead.